Use your Visual Studio Azure Credit
Did you know that you could have an unused Azure credit in your Visual Studio subscription? Keep reading if you want to explore Azure for training and development without additional cost!
Your Visual Studio Admnistrator can assign an Azure $150 monthly credit or an Azure $100 credit (one time benefit) to your Visulal Studio account. If you have a choice, use the monthly credit. You can use part or all of the credit each month and it will be topped off again at the beginning of the next month. Once you have exhausted the credit you won't be able to use your resources for the rest of the month, but you won't be charged for them either - which is kind of the point.
Start With the End in Mind
Before you start, consider which user you login with. If you created your sandbox tenant via your organization user in Create A Sandbox Tenant, continue to use that user. This user should satisfy the requirements to claim your Visual Studio benefit and optionally move it to your sandbox tenant:
- You need a user that has access to your organization's Visual Studio benefit so that you can claim the credit and create a Visual Studio Enterprise Subscription.
- This user will become owner of the new Visual Studio Enterprise Subscription.
- This user will need to be in both the source and target active directory (tenant) for the transfer.
Azure Visual Studio Credit
-
Log in to Visual Studio. You will have access to Benefits, Downloads, Product Keys, etc.
-
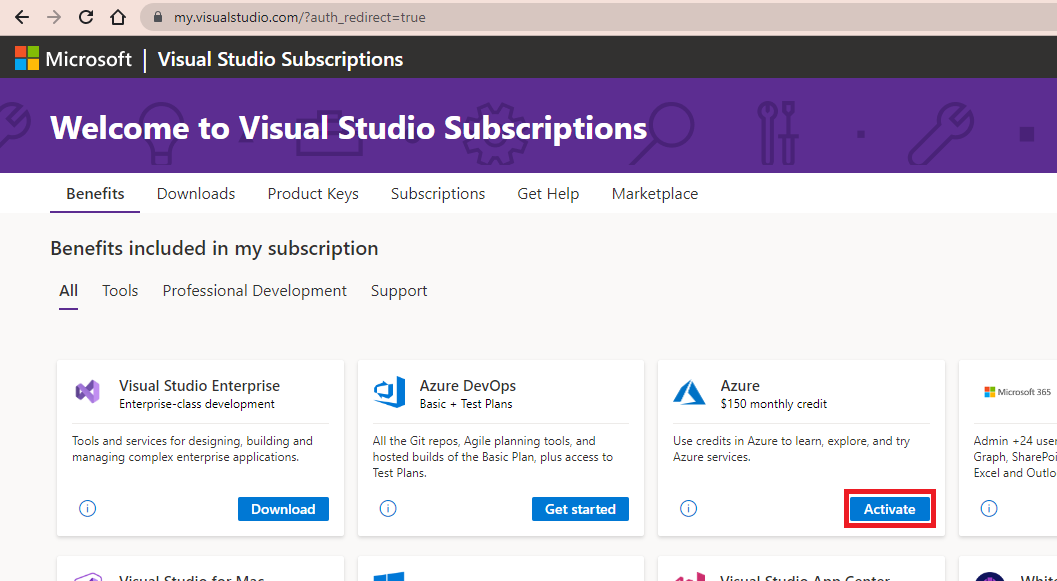
Go to the Benefits tab. You may see one or more Azure benefits.
-
Click Activate on the benefit that you want to enable. Azure will execute some automation that creates a new subscription with the credit in your organization's tenant. Unfortunately, there isn't really any way to monitor this, so now is a good time to take a break. Come back in a few minutes to check the progress.
-
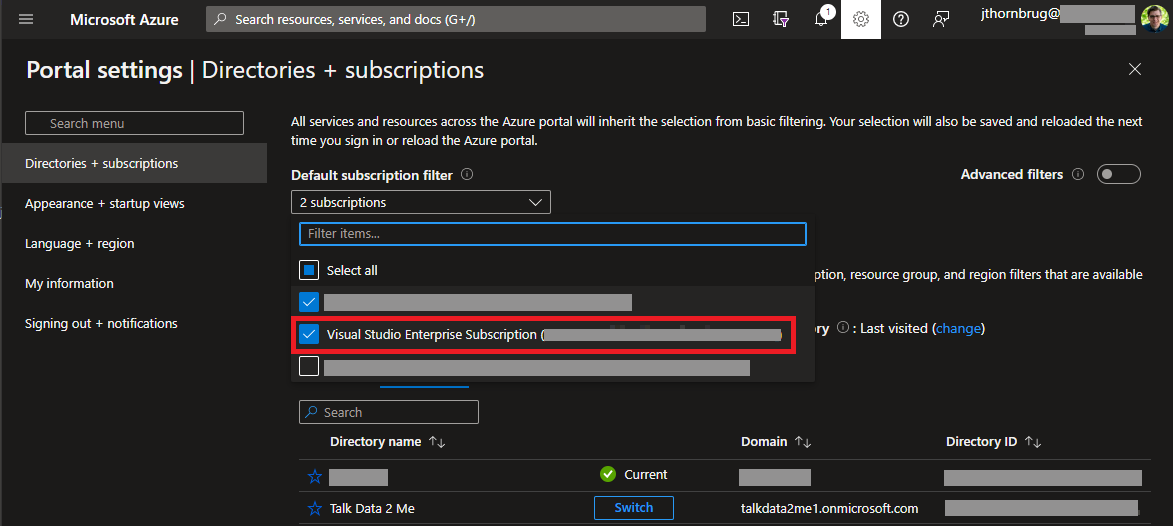
Click the settings button.

-
Pull down the subscriptions filter. You should see Visual Studio Enterprise Subscription. Make sure that it's checked in the filter. So that you can see it elsewhere in the Portal.
If you don't see the subscription show up, you may (or may not) find information in Notifications (the bell icon). If you need help, you can contact Microsoft support to help resolve problems with your Azure credit.
Transfer the Subscription (optional)
Transfer the Subscription from Your Org Tenant to your Sandbox Tenant
-
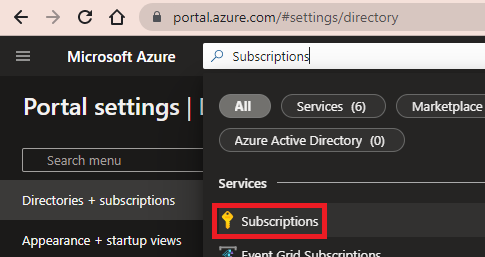
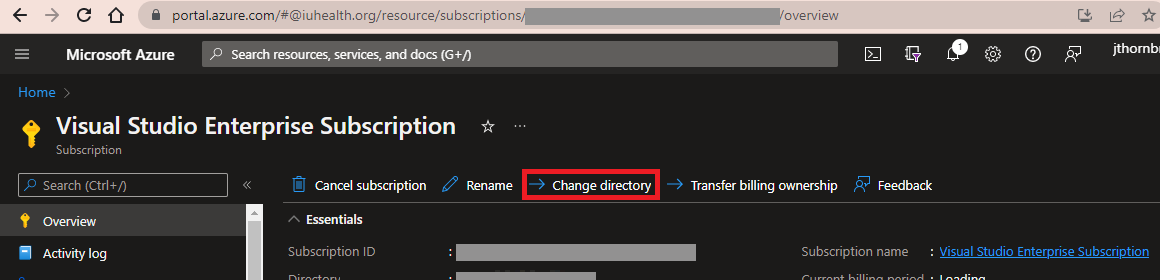
In Azure Portal search, type Subscriptions and click the Subscriptions service.
-
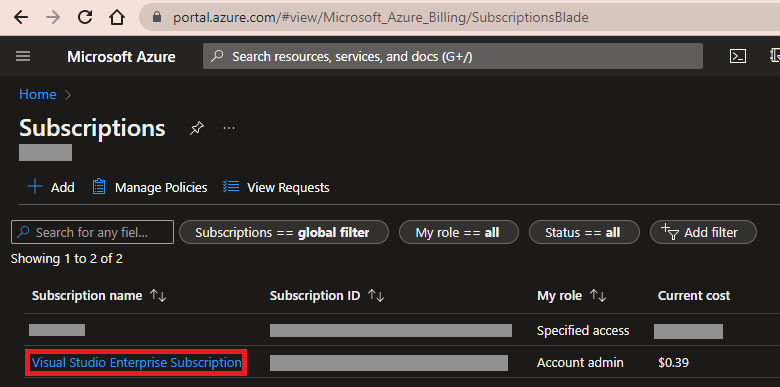
Click Visual Studio Enterprise Subscription
-
Click Change Directory.
-
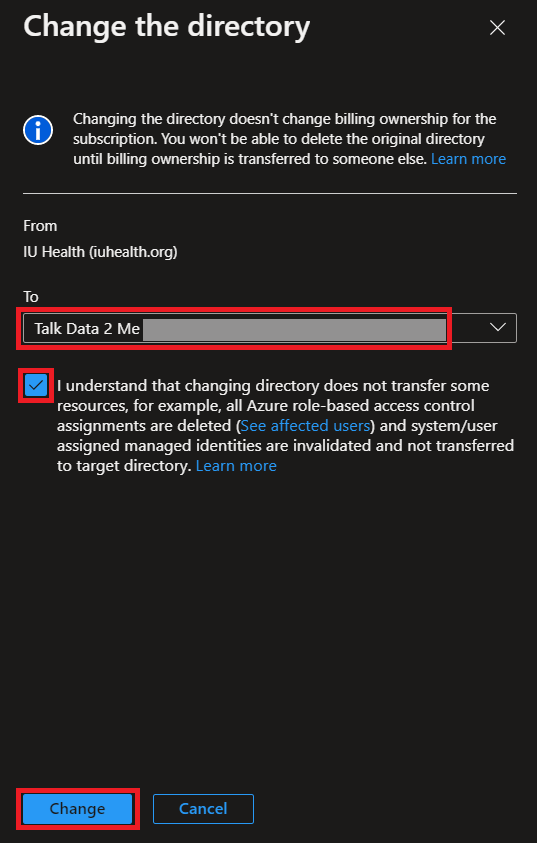
Select your sandbox tenant. and click Change
-
Now is a good time to take a break. Come back in a few minutes to check the progress.
-
Refresh the Subscriptions list, you should no longer see Visual Studio Enterprise Subscription.
-
Click the settings button and pull down the subscriptions filter.
Verify the Subscription in Your Sandbox Tenant (optional)
-
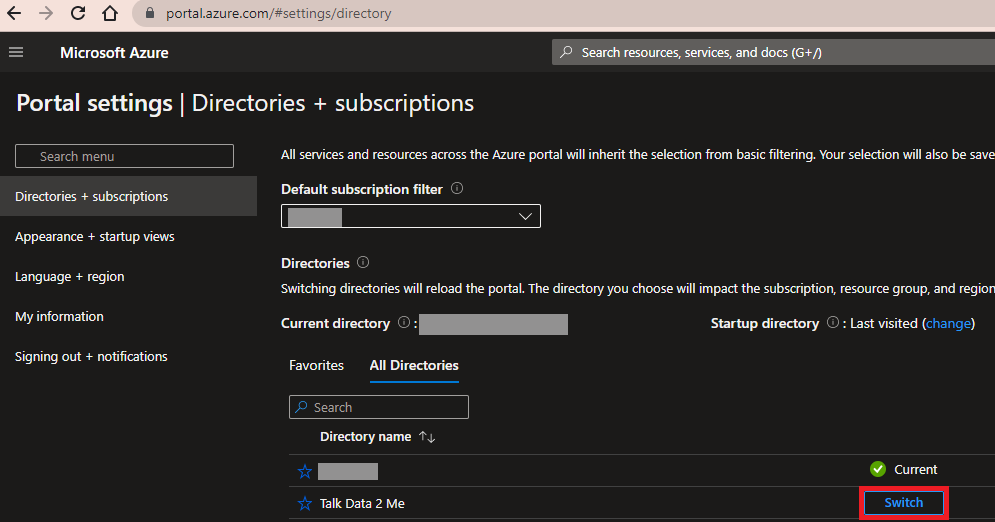
Click the settings button and click Switch next to your Sandbox tenant.
-
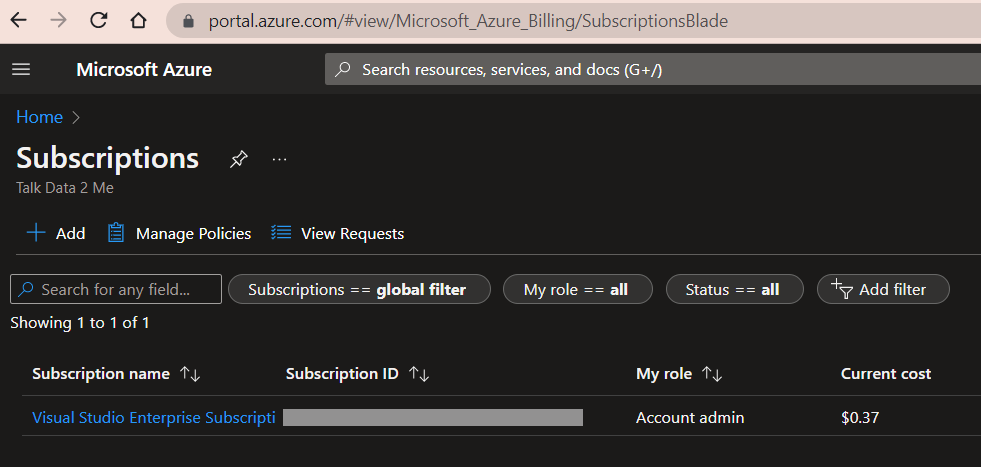
Verify access to Visual Studio Enterprise Subscription in your sandbox tenant.
If you don't see the subscription show up, you may (or may not) find information in Notifications (the bell icon). If you need help, you can contact Microsoft support to help resolve problems migrating your subscription.
Note: Although the Visual Studio Enterprise Subscription is being paid for by your organization's Visual Studio benefit, your organization does not have control over your sandbox tenant. Don't put sensitive data in your sandbox tenant or Visual Studio Enterprise Subscription.
So, there you have it: You're now ready to explore Azure for training and development without additional cost to you!