Azure Functions for PowerShell
Azure Functions are an inexpensive way to run lightweight utility code. Some of my favorite use cases for Functions are:
- stashing log data from APIs into log analytics
- custom custodian scripts (a la cron jobs)
- supplementing low code workflows (ADF, Logic Apps, etc.) with custom code
In this lab, we'll create an Azure Function, enable a Timer Trigger, enable a Web Trigger, enable support for the AZ module, add input from Application variables, and provide input via HTTP request body, query and headers.
Create an Azure Function Resource
First, we need to create an Azure function in the Azure Portal.
-
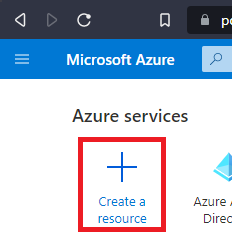
Click + Create a resource
-
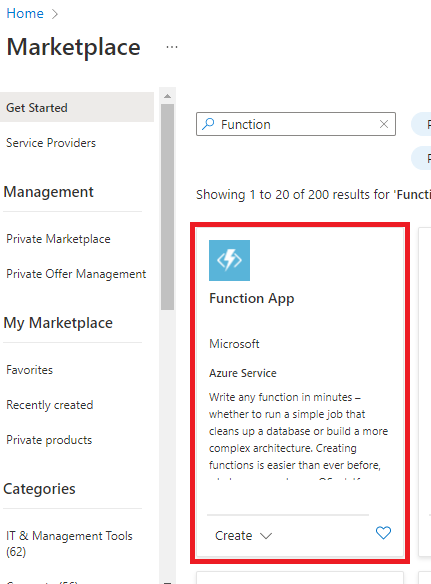
Type Function in the marketplace search field. Click Function App
-
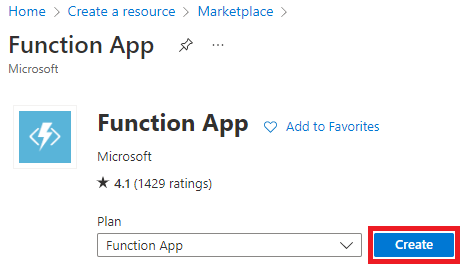
In the Function App Marketplace item, keep the default plan and click Create
-
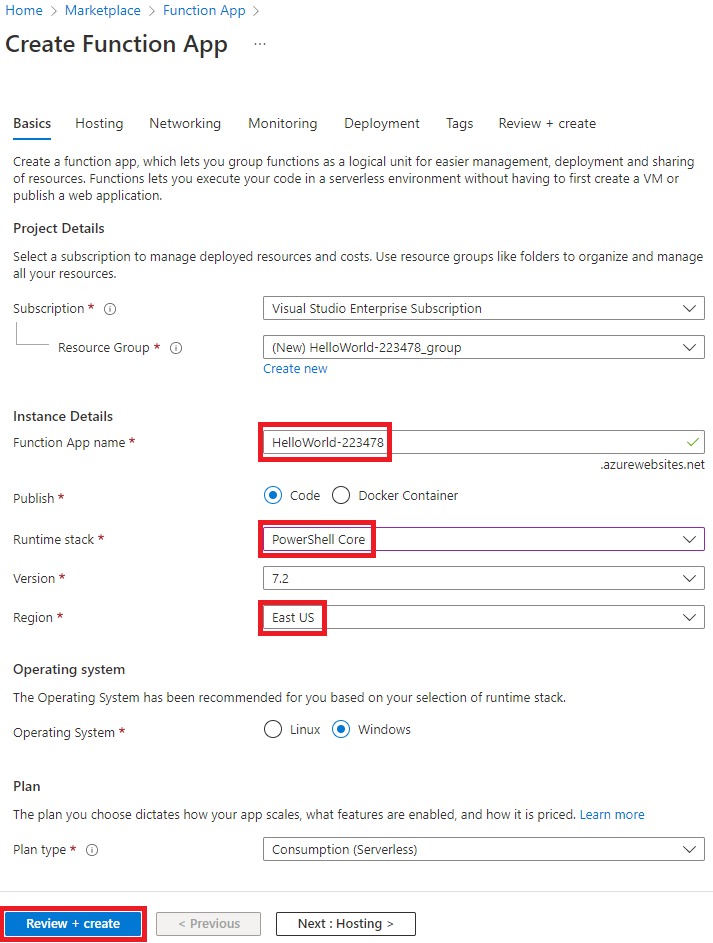
In Create Function App, set the following fields. For this lab, you can leave the rest of the settings at defaults.
- Function App Name: HelloWorld-# (Set # to a random value)
- Runtime stack: PowerShell Core
- Region: A region closest to you.
-
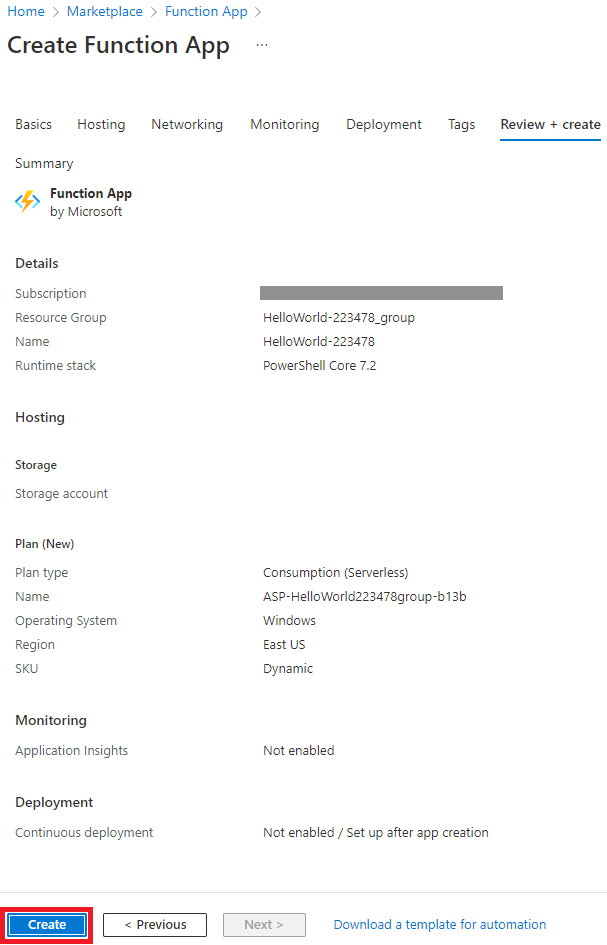
Click Review + create
-
Confirm the settings and create the resource by clicking Create
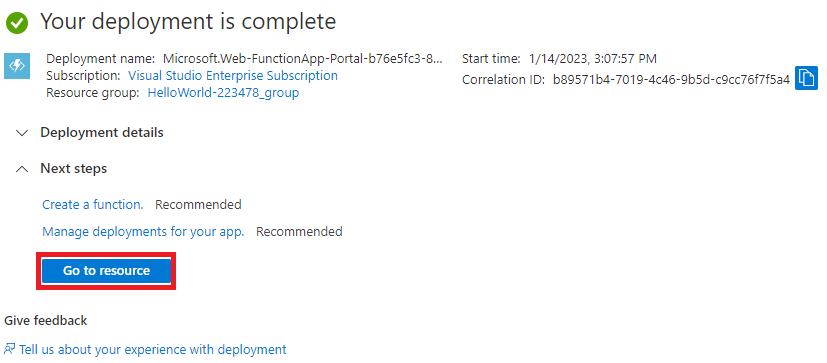
-
When the resource is finished creating, click Go to resource
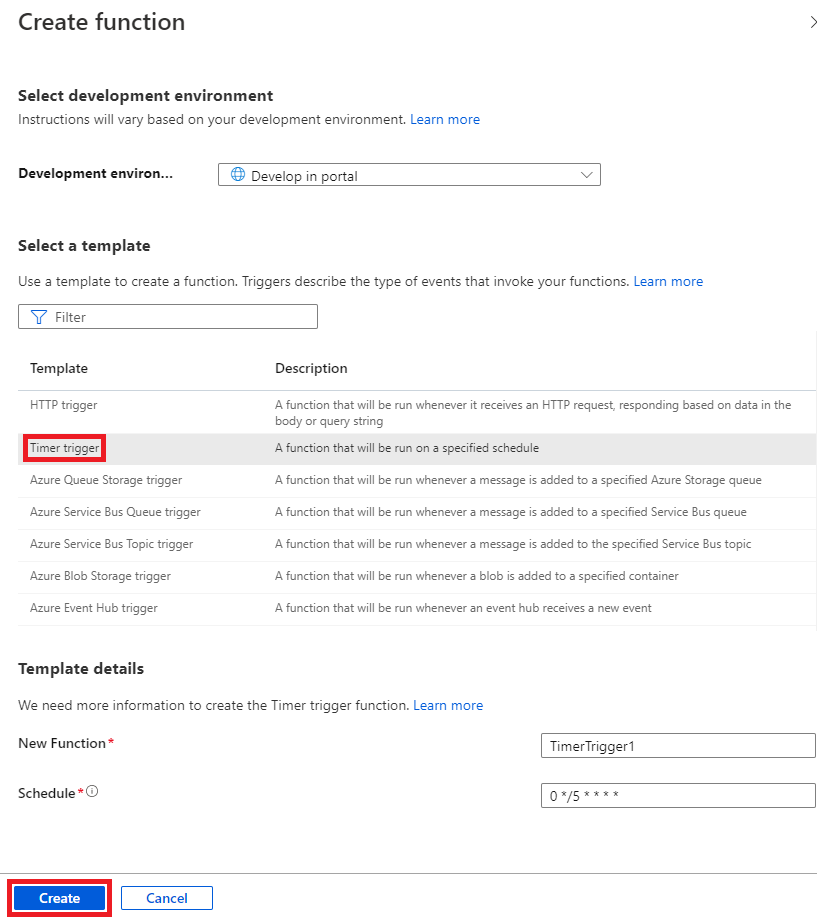
Create a Function with Timer Trigger
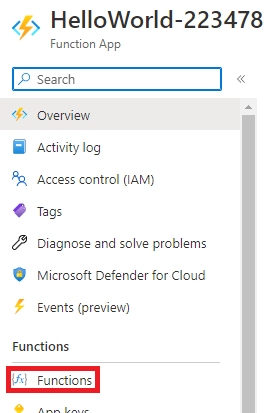
Now we will create a Function in the Function App. We will use a timer trigger for this function.
-
Click Functions to go to the functions in the Function App
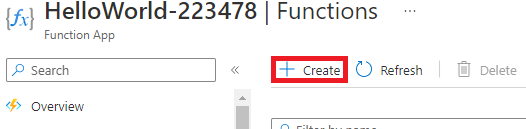
-
Click Create to create a new Function
-
For Template select Timer trigger. You can leave the rest of the fields at defaults.
-
If you want to use a custom Schedule, note that Azure Functions use the NCronTab library. The fields are: {second} {minute} {hour} {day} {month} {day-of-week}
-
Click Create
Add and Run Code
Now we will add simple custom code.
-
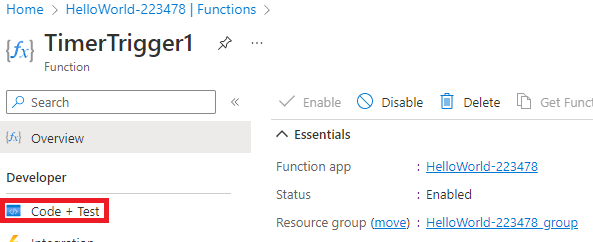
Click Code+Test
-
Add the following custom code to the end of the template. Don't change the template lines. The currentUTCtime is expected by the framework and we need the param section.
Write-Host "Hello World!"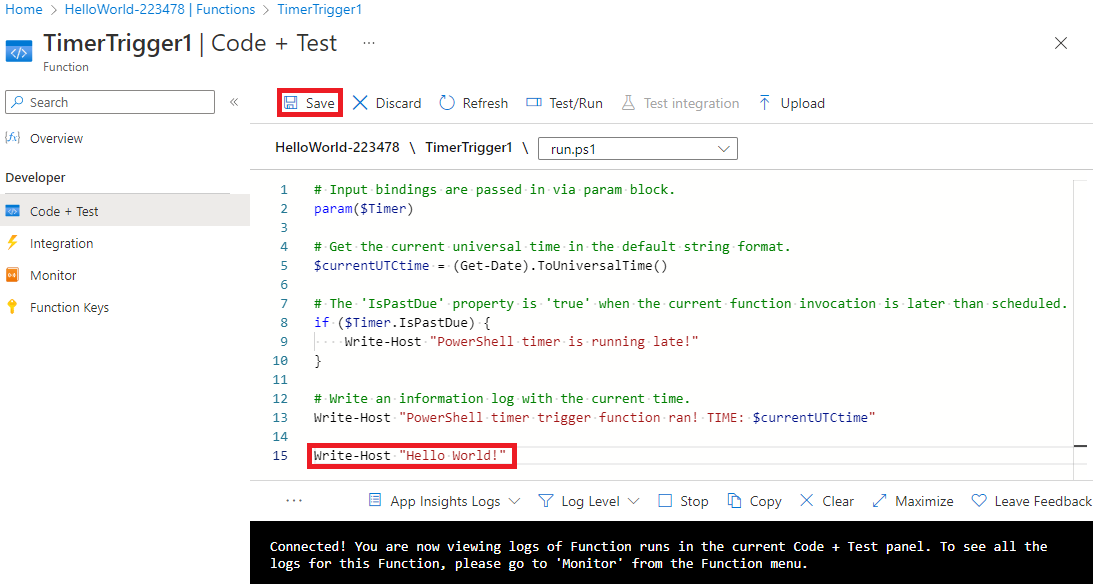
-
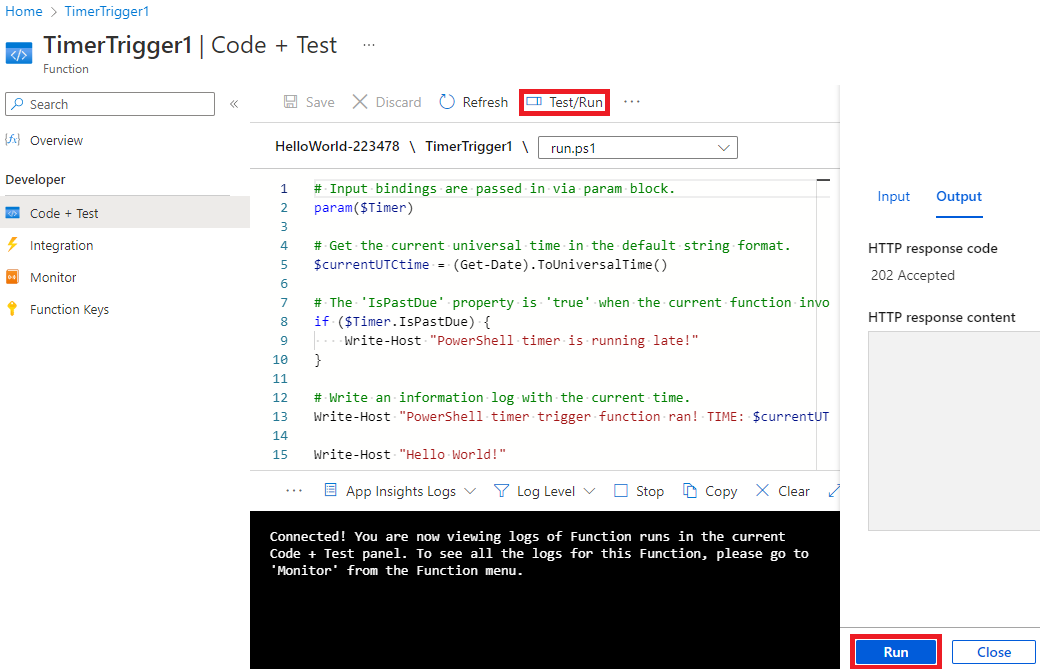
Click Test/Run and then click Run
-
Wait for the code to execute. You should see your output in the log.
2023-01-15T00:11:15Z [Information] INFORMATION: Hello World!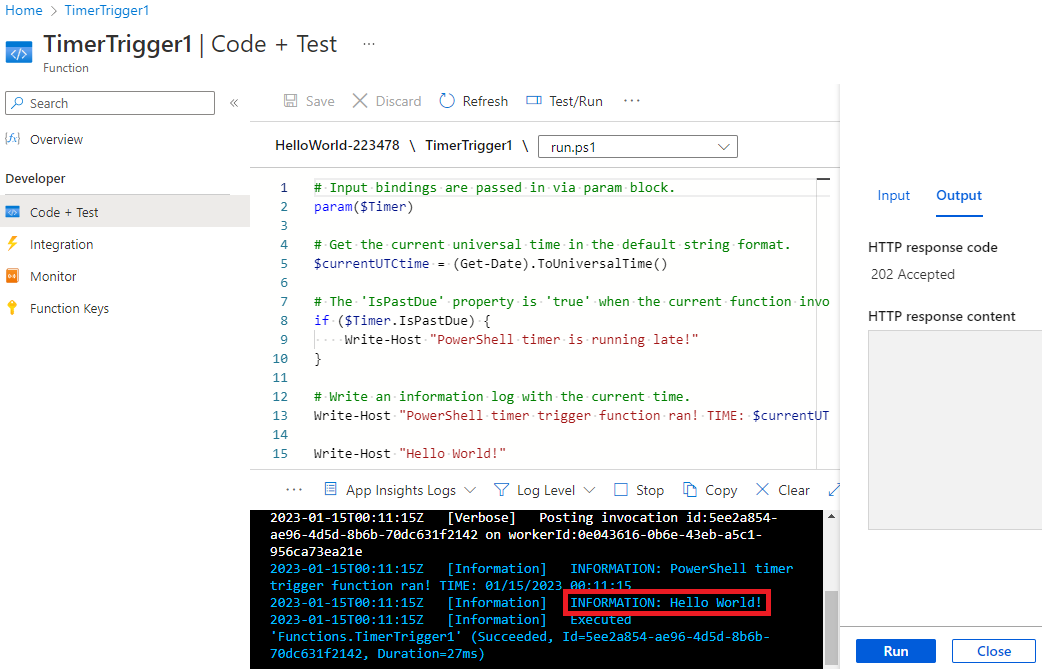
Enable Az Module Support (optional)
Azure Functions have Out of Box support for the Az PowerShell Module. There are many scenareos where you will need to interact with Azure and the Az PowerShell Module is the easiest way to do that. To enable support for the Az PowerShell Module, we will need to update a configuration file in the Kudu management interface. Kudu can also be used for advanced diagnostics of an Azure Function or App Configuration.
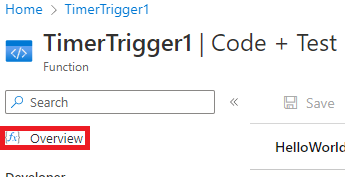
Navigate to the Function App in another tab. We will be returning to the code window later.
-
Control-Click Overview
-
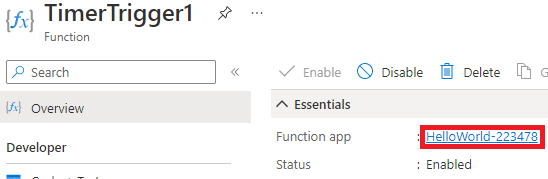
Click the Function app name e.g. HelloWorld-223478
-
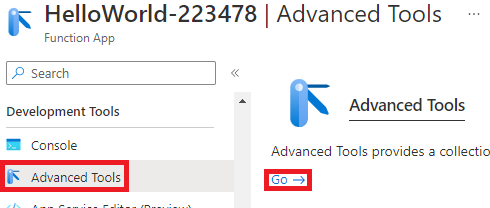
Click Advanced Tools and click Go
-
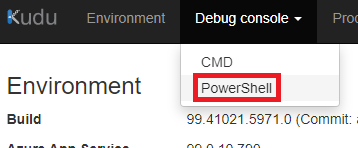
Select the Debug console -> PowerShell pulldown
-
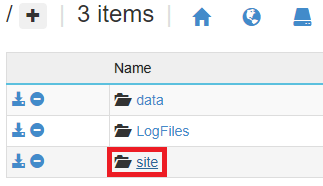
In the folder navigation, click site. Note: The shell also accepts command input.
-
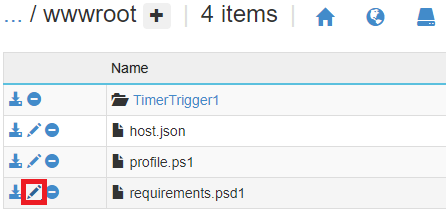
Click wwwroot

-
Click the pencil icon next to requirements.psd1
-
Uncomment the last line to enable the Az module. You can adjust the version restriction if needed, but keep the default setting for now. The value 9.* signifies to use the latest module with major version 9.
'Az' = '9.*'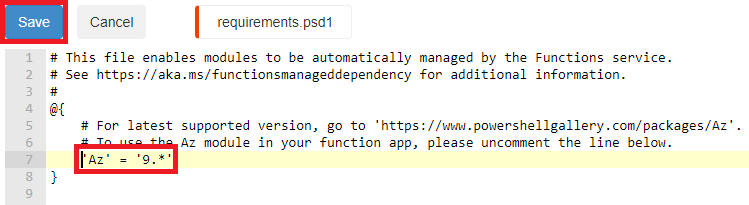
-
Since we've just enabled the module, it hasn't been downloaded and installed yet.
-
Click Test/Run and then click Run. The module will be downloaded and installed. Review the log to see the progress. You will see code monitoring errors because downloading and installing the Az module takes longer than the function timeout. The module should install successfully, but the code will not actually execute this iteration. It will take a few more minutes for the Az module to finish installing.

-
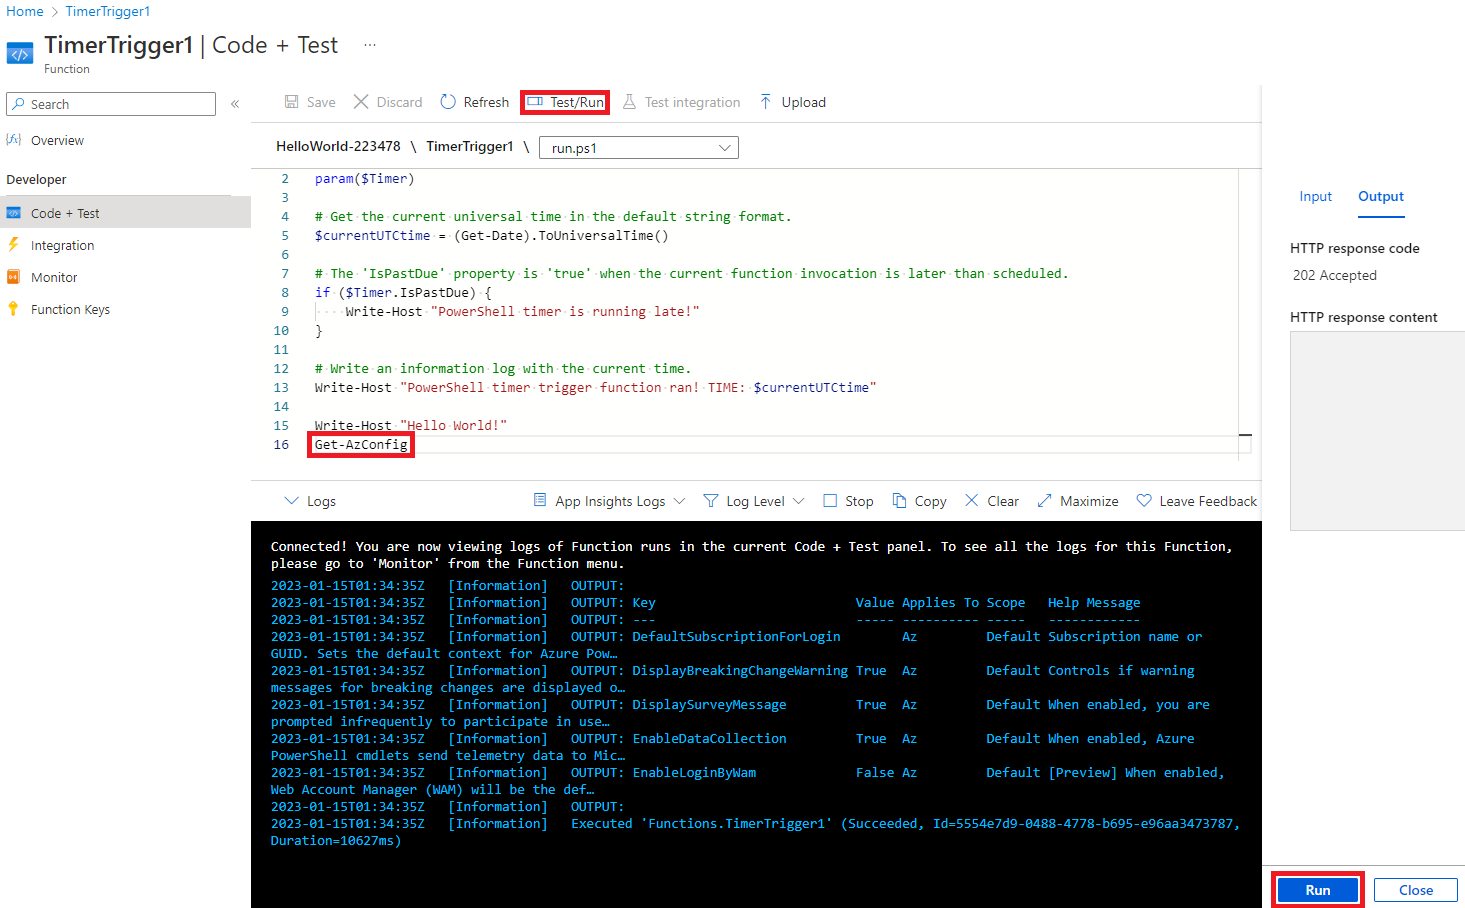
Update the code by adding a Function from the Az Module. To keep it simple, we will use a function that does not require an Azure Connection. Add the following to the function.
Get-AzConfig
- Click Run. You should see output similar to the following
Azure Connections
If Identity is enabled in the Azure Function, the Azure Function implicitly connects to the System Managed Account or User Managed Account before your code is run. If you need to connect to Azure with other credentials, you will need to explicitly connect to Azure with Connect-AzAccount.
Set and Read Application Settings
Now we will retrieve Application Settings from the Function Configuration. The Application settings in the Function App are automatically configured as environment variables when the Function App starts. These environment variables are available to your script at runtime.
Navigate to Function App in another tab. We will be returning to the code window later.
-
Control-Click Overview
-
Click the Function app name e.g. HelloWorld-223478
-
Under Settings, click Configuration
-
Click + New application setting
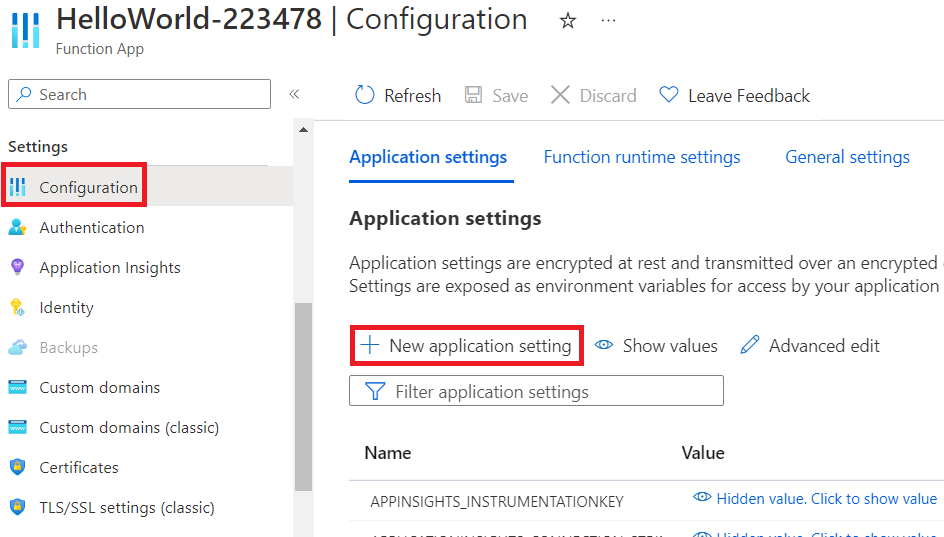
-
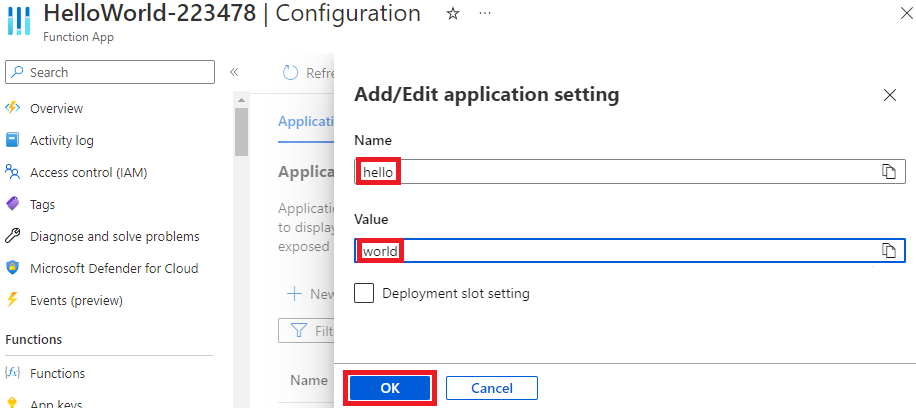
Enter the name/value pair and click OK.
- Name: hello
- Value: world
As a matter of code style, you may consider using a prefix for all of your variable names. Since the Application settings are sorted by Name in the UI, a prefix will cause them to neatly group by name in Application settings. Example: customVar1, customVar2, ..
-
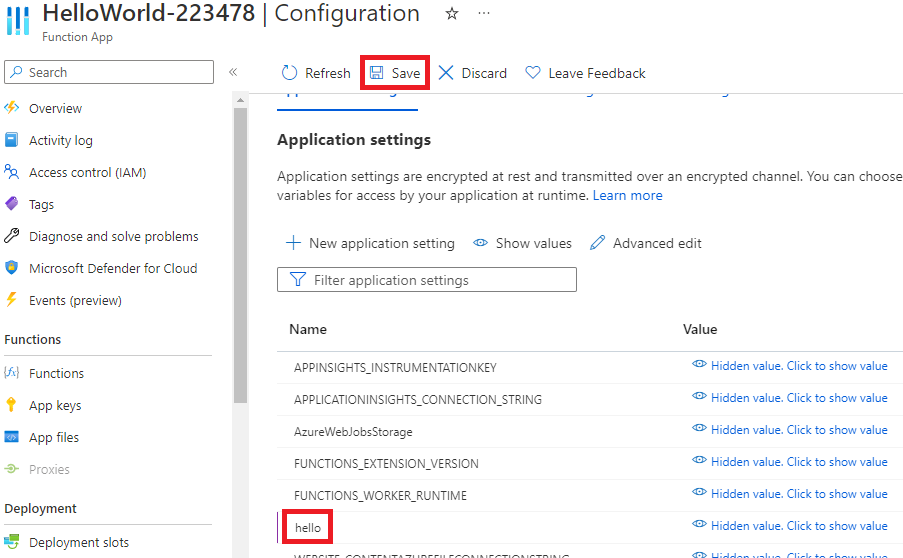
Click Save to apply the change and then click Continue to apply the change with a restart of the Function App.

-
Return to the code editor
-
Add a line of code that references the custom variable. Click Save and click Run. You should get output similar to that below.
Write-Host "Hello $env:hello!"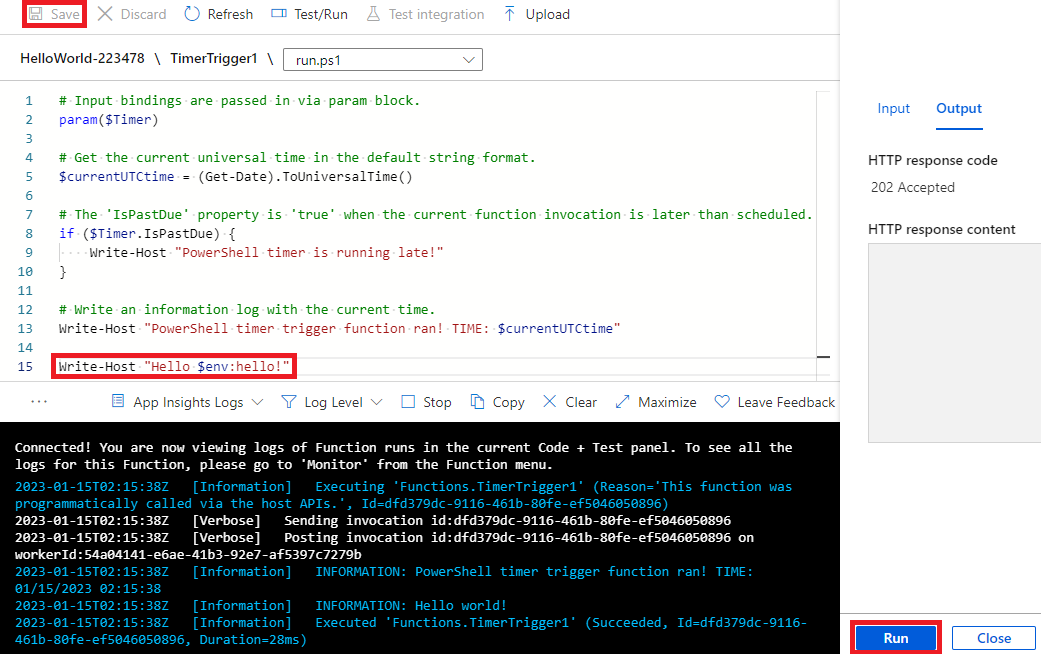
Variables and Source Control
You can optionally use different settings for dev/qa/prod by using different settings for your dev/qa/prod instances. To manage separate dev/qa/prod instances, either create separate Azure Function Resources for each, or create specific slots for dev/qa in your instance. You can then create slot-specific variables. A detailed review of slots is beyond the scope of this article.
Add a Web Trigger
We will now add a Web Triggered function to show how we can run code via HTTP(S) request.
-
Click Overview
-
Click the Function app name e.g. HelloWorld-223478
-
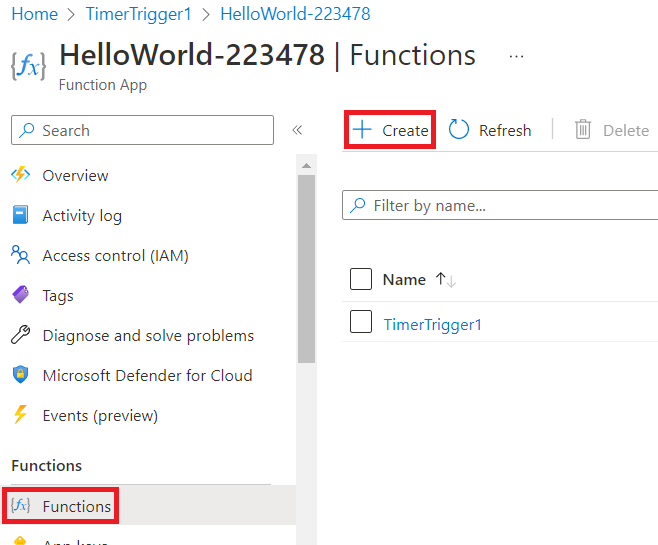
Click Functions and click Create
-
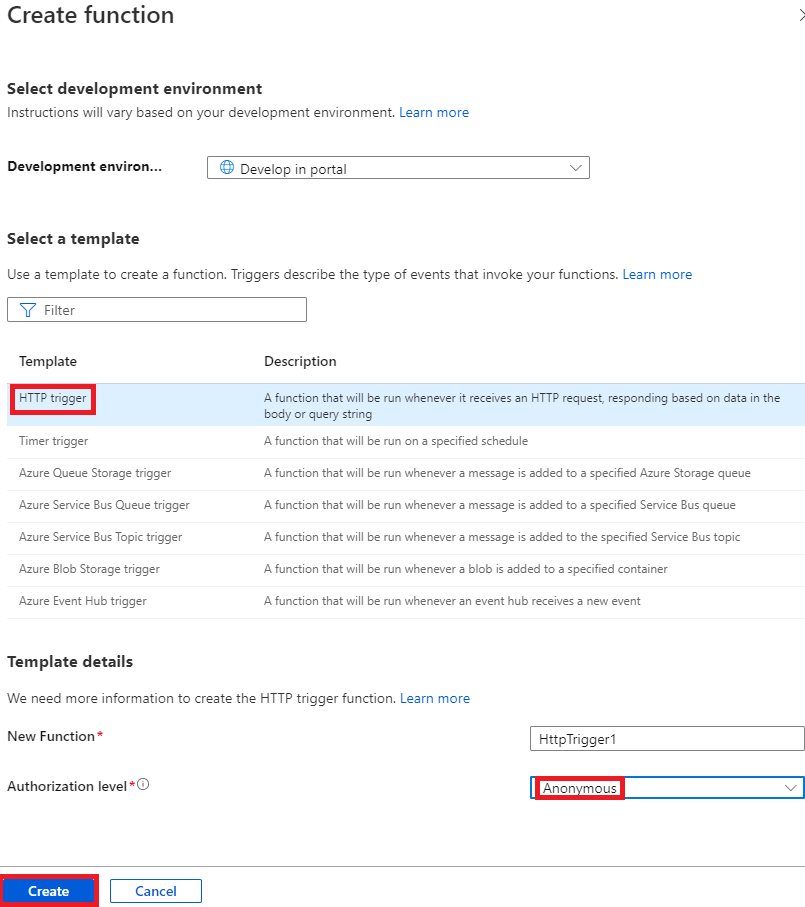
Click HTTP trigger, set Authorization level to Anonymous and click Create. For secure APIs, you would set the Authorization level to Function or Admin.
-
Click Code+Test

-
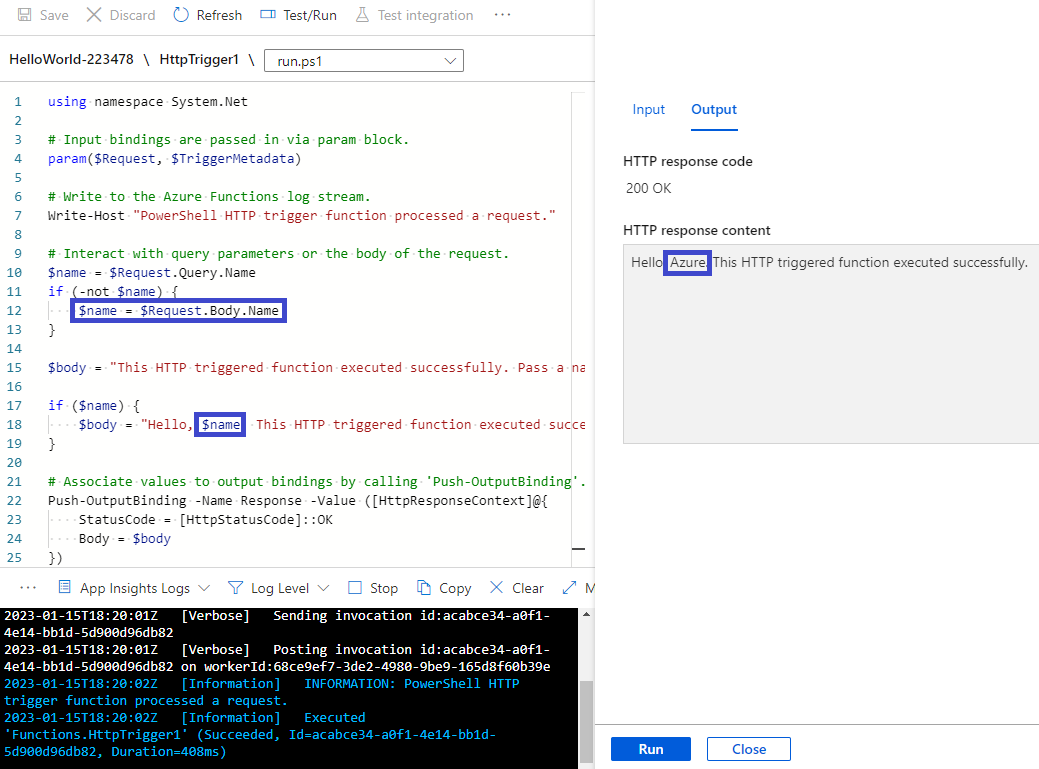
Examine to variable flow:
a. The name is already set as Azure in the HTTP Body JSON.
b. The HTTP Body will be passed in via the $Request parameter.
c. The value of $Request.Body.Name is set as Azure
d. The value of $name is then set as Azure
e. The value of $name is used to construct $body
f. Finally, $body is returned in the HTTP response body. -
Click Test/Run and Run
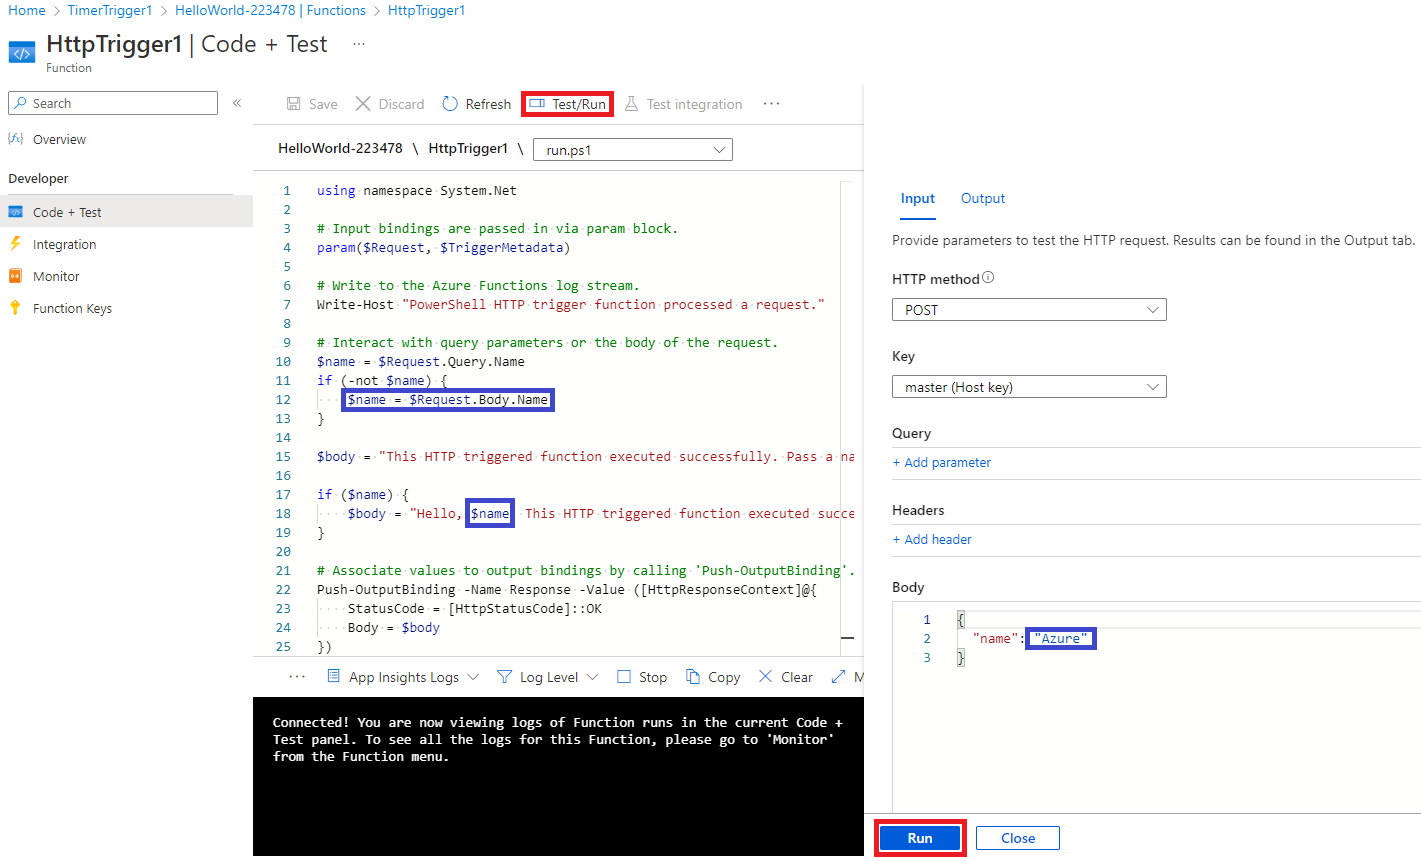
-
Confirm that the HTTP response has the value Azure for the name
-
Set a Query parameter to name/AzureQuery and click Run. Note that on this execution, $name will be set from $Request.Query.Name
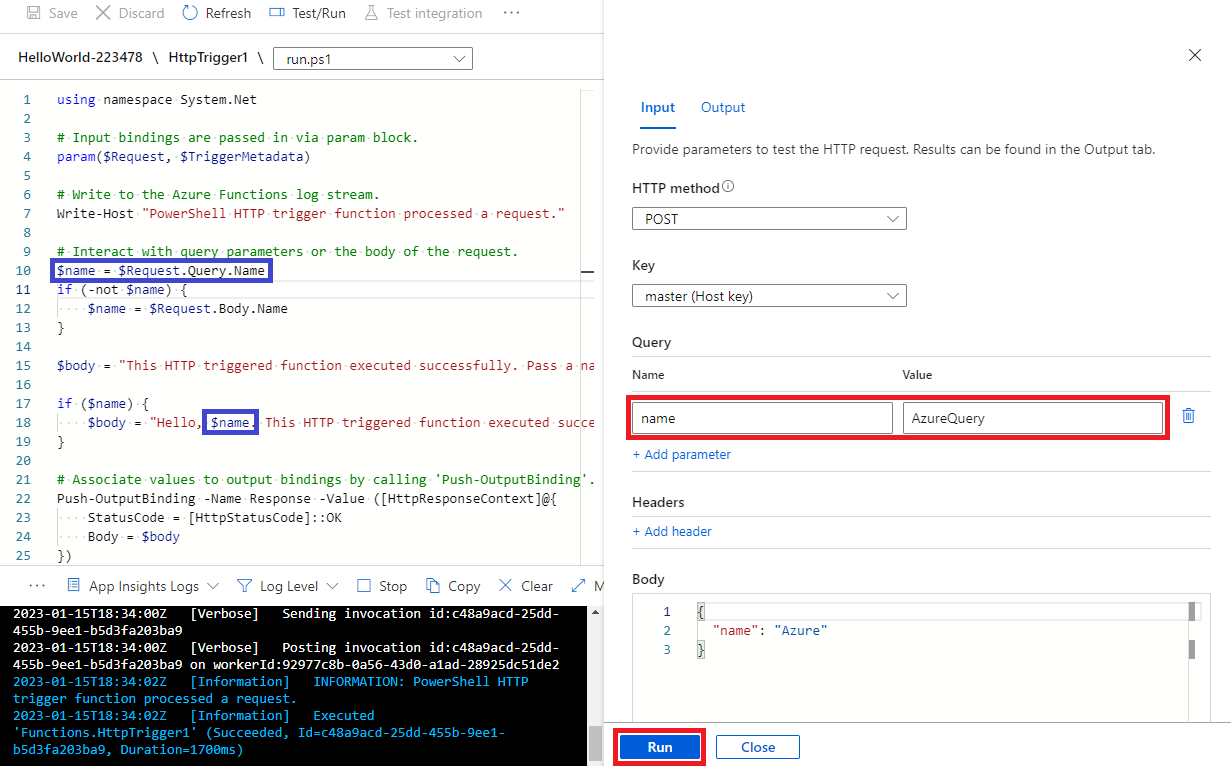
-
Confirm that the HTTP response has the value AzureQuery

-
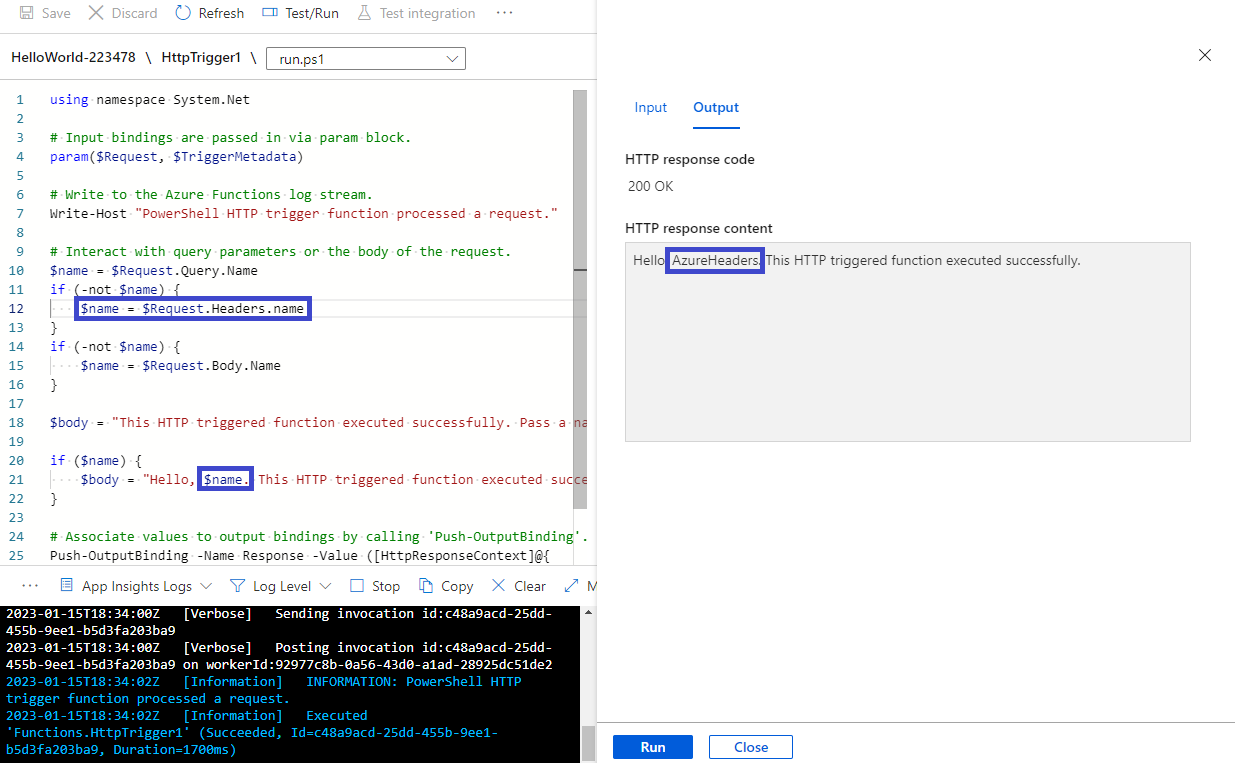
The default code does not have a handler for Headers, so we'll add one. Insert the following code between "$name" and "if (-not $name)". The insert point is line 11 as of this writing. Click Save to apply the code change.
if (-not $name) { $name = $Request.Headers.name } -
Remove the Query parameter, set a Header parameter to name/AzureHeaders and click Run. On this execution, $name will be set from $Request.Headers.Name
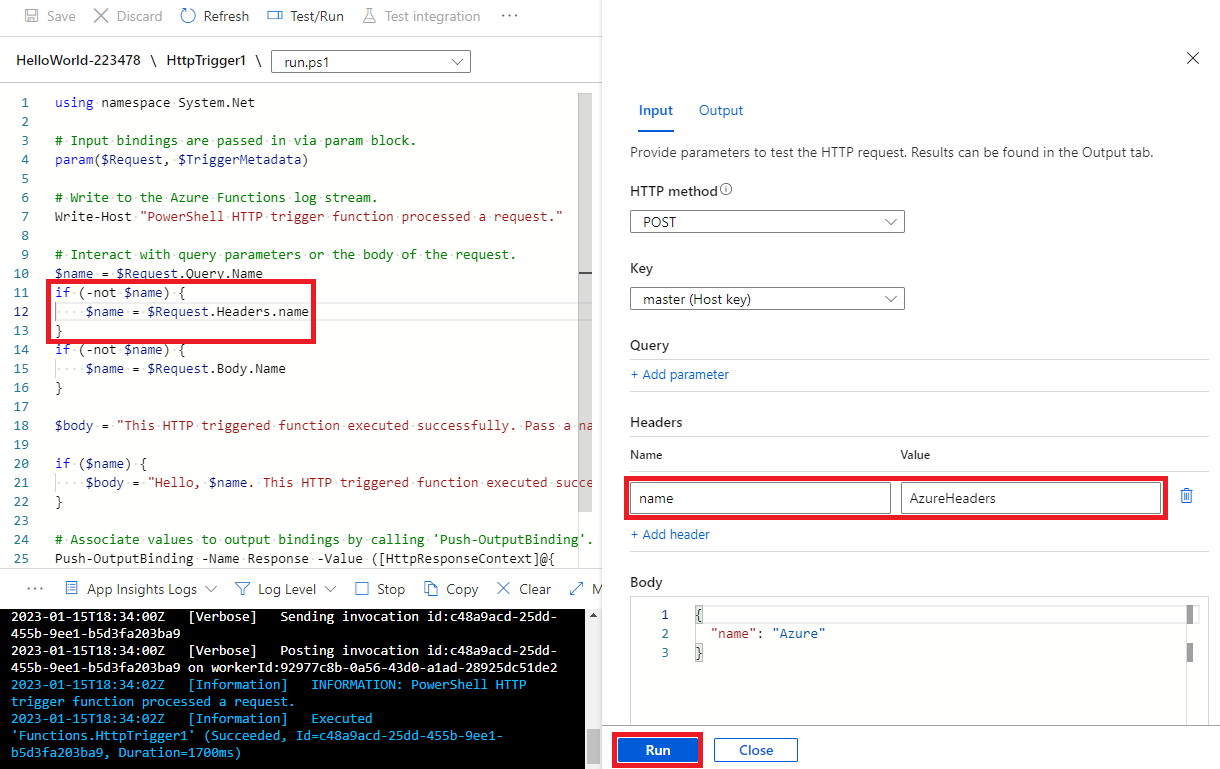
-
Confirm that the HTTP response has the value AzureHeaders
Congratulations! You are now ready to begin your journey coding Azure Functions.